3D Camera Export
Animating in Earth Studio is incredibly powerful, but it's only the beginning. With the ability to export camera data and tracking markers to post-production software, it's possible to seamlessly composite 2D and 3D elements into Earth Studio imagery.
Overview
While Overlays and KMLs enable the addition of simple elements to Earth imagery (e.g. text, borders, and shapes), more complicated elements must be added outside of Earth Studio.
3D Camera Export, currently compatible with Adobe® After Effects®, makes this process incredibly straightforward. By natively exporting camera data from Earth Studio, you can be sure that composited elements will perfectly line up with your footage.
You can also create and export Track Points along with a project's camera data. Track Points are represented as null objects in After Effects, and are helpful for positioning elements in your scene. Set a Track Point anywhere you plan to place an element in post-production, or set a few to use as reference.
Take a look at our Permissions for more information about annotations and adding custom graphics over Google Earth imagery.
Adding and Editing Track Points
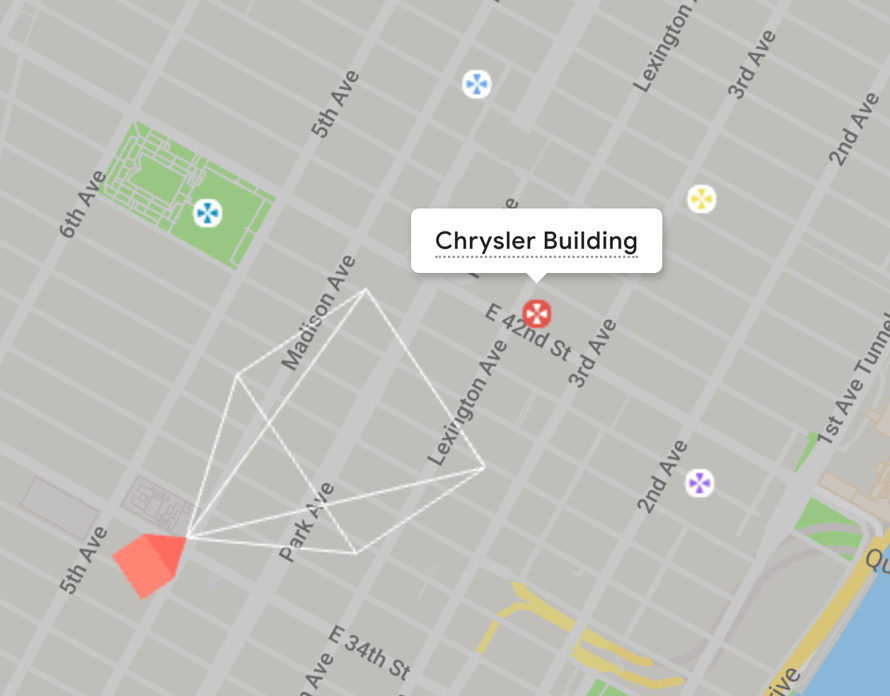
To set a Track Point, right-click anywhere in the Camera view and select Set Track Point from the menu. A new Track Point will be added at the location of your click.
Track Points in Multi-View
Track Points can also be created from the Top view. The latitude and longitude will be defined by where you click, and the altitude will be defined by the ground level at that location.
Click on a Track Point to select it. Rename it by clicking on its name, and drag to change its location. Double-click to open the Track Point panel.
Track Point Panel
All existing Track Points are listed in the Track Point panel, which appears in the viewport whenever a new Track Point is created. From the panel, you can edit a Track Point's name, display colour or exact coordinates. Use the bin icon to delete a Track Point.
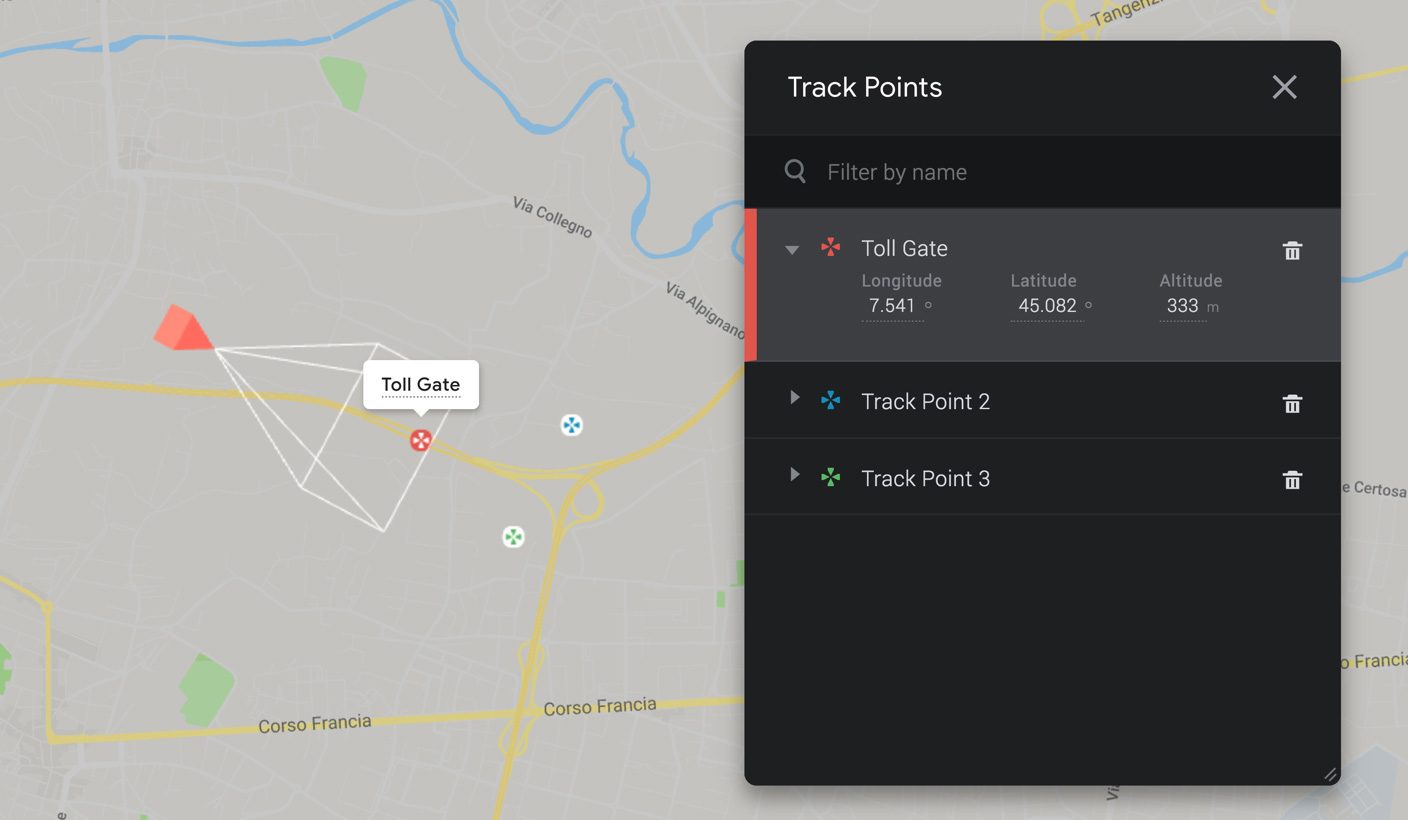
You can access the Track Point panel at any time from View > Track Points.
Exporting Tracking Data from Earth Studio
If you want to use your camera and track points outside of Earth Studio, you'll need to export that data in a format that a third-party program can understand.
For After Effects, this is an Adobe ExtendScript file (.jsx), which recreates the camera and any track points within a new After Effects composition.
Exporting with a Render
In most cases, it's best to export tracking data along with a render. This ensures that your camera and track points are perfectly up-to-date with the underlying footage.
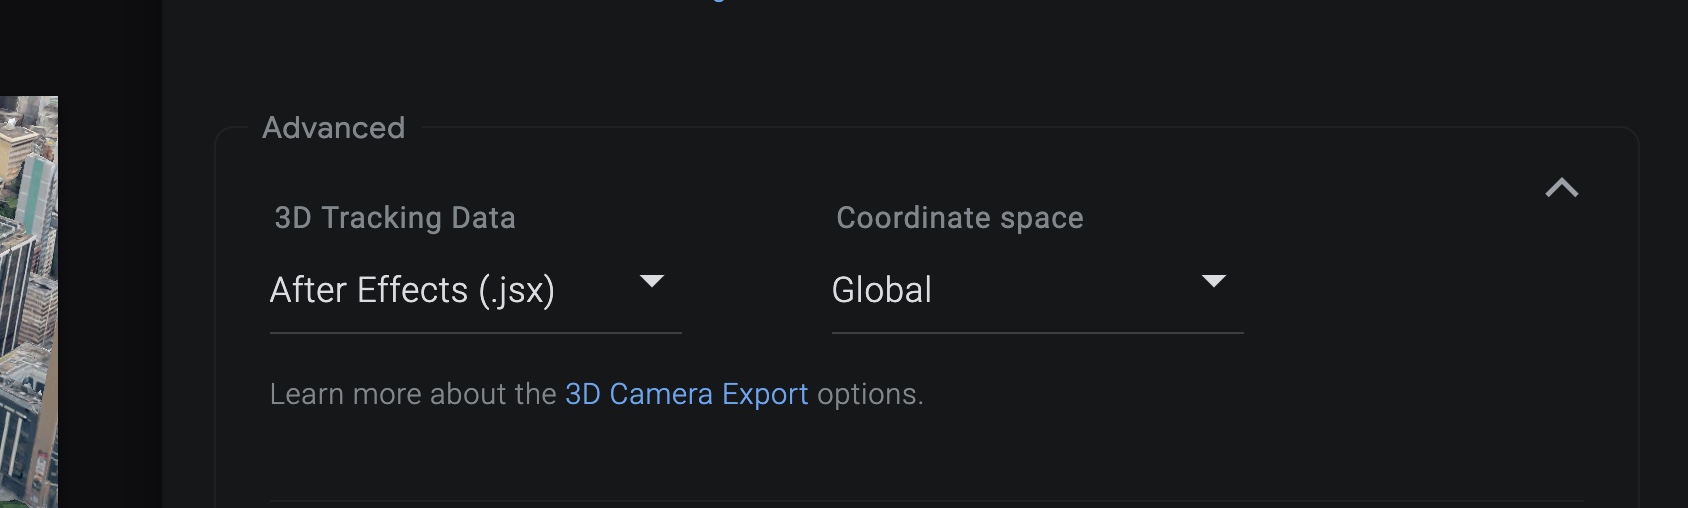
To get tracking data when you render, select the desired format under 3D Tracking Data in the Advanced Settings. The tracking data script will be included with your image sequence and project file in the resulting zip.
Exporting as Standalone Script
Some situations might require you to export tracking data for a project that has already been rendered. For example, you might need to add additional track points to an existing animation.
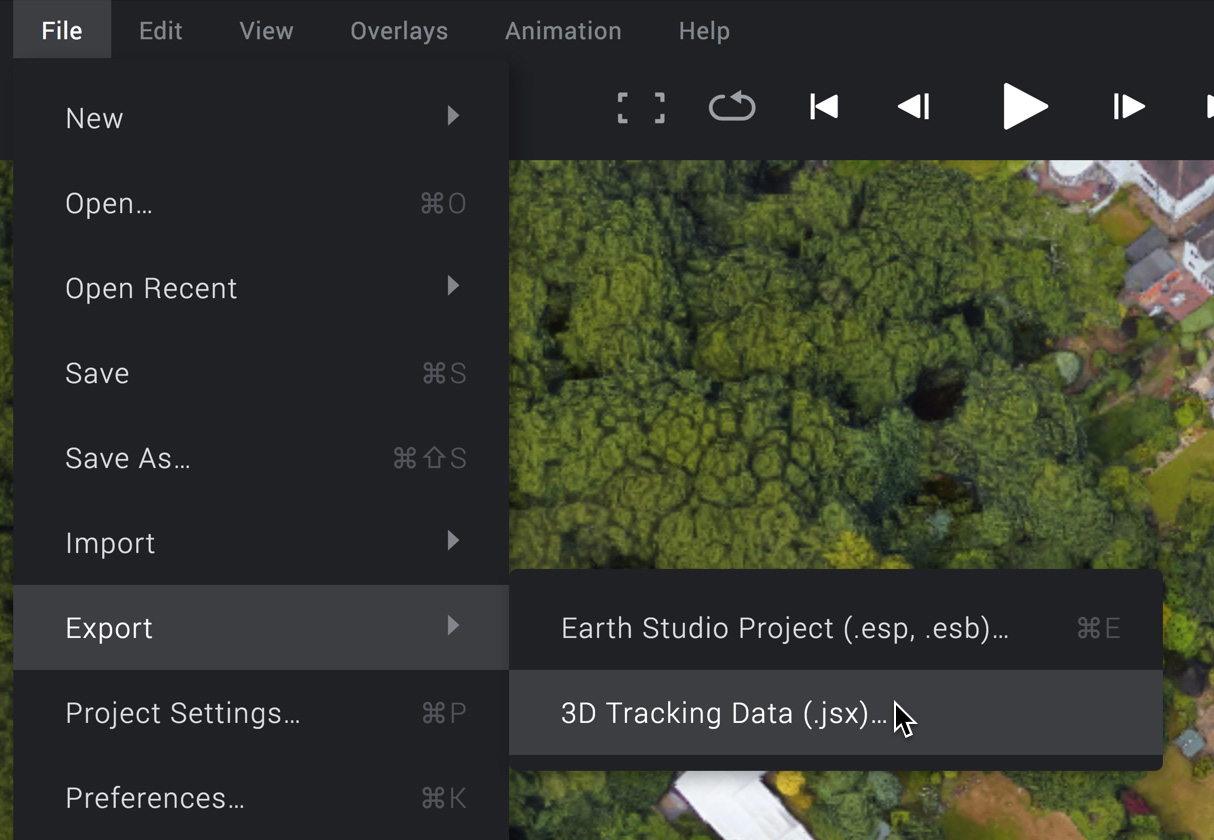
At any time, you can use File > Export > 3D Tracking Data... to export tracking data without re-rendering. Select which tracking elements you need (3D Camera and/or Track Points), and Earth Studio will begin downloading your tracking data as a .jsx file.
Ensure that there are no differences between the camera in your tracking data and the camera motion from your rendered footage. If there are, you'll need to re-render your project. Otherwise, composited elements will not line up with your Earth Studio footage.
Importing Tracking Data to After Effects
To use your tracking data in After Effects, simply run the tracking data script. In a new or existing project, go to File > Scripts > Run Script File... and navigate to the .jsx file exported from Earth Studio.

After Effects will attempt to locate your rendered footage based on the name and location of the script file. If it cannot find the footage, you'll have the option to locate it or continuing without importing.
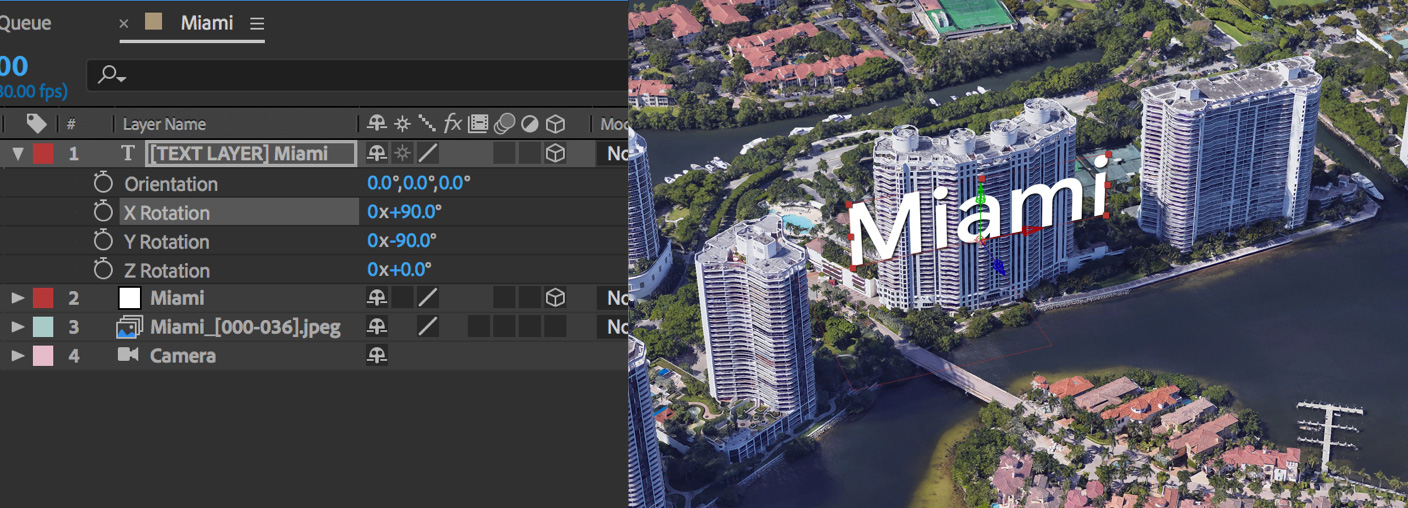
The result is a new composition with your tracking data pre-loaded: a Camera layer with keyframes to match your Earth Studio camera, null objects for each Track Point, and your rendered footage (if imported). In addition, a text layer, set to the Track Point's name, is parented to each null object, which can be repositioned and styled for easy labelling.
Compositing in After Effects
When converting from geographic coordinates (latitude, longitude, altitude) to the Cartesian coordinate system in After Effects (x, y, z), the resulting position values are in the order of millions. This creates a few quirks to keep in mind when compositing in After Effects.
Positioning Elements with Track Points
Due to the extremely large scale of the Earth, it's nearly impossible to place elements on the globe manually in After Effects. Instead, Track Points should be used for all positioning needs.
When creating a new element, first parent it to the desired null object and set all Position and Rotation values to 0. This will ensure that the element is perfectly aligned with the null.
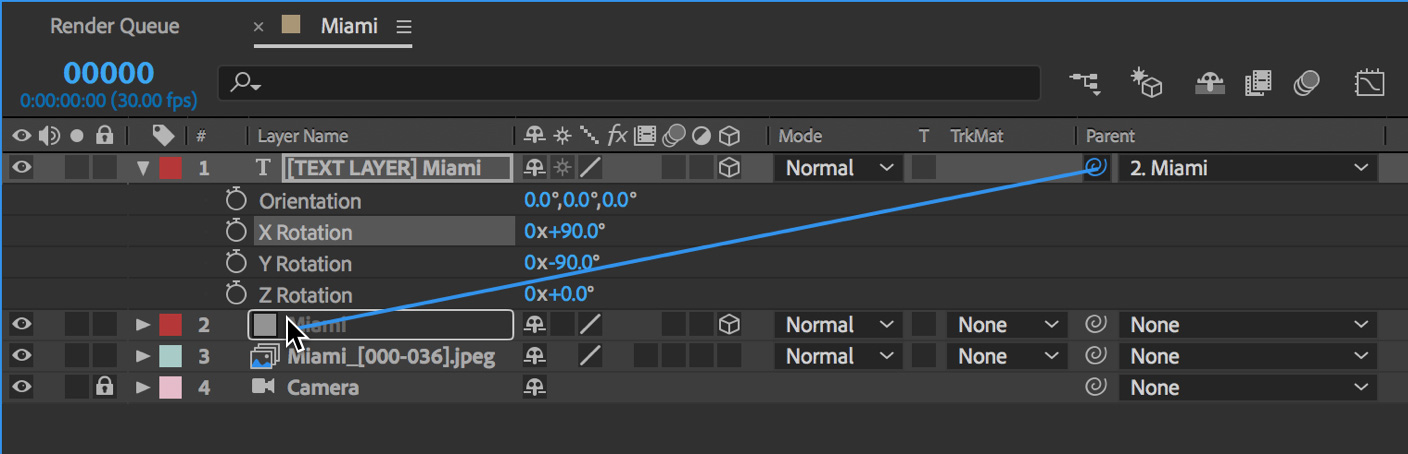
By default, Track Point null objects are oriented flat on the ground, pointing North. You can set the X Rotation of your element to +90.0° to orient it perpendicular to the ground plane.
If you need to further adjust the position of an element, it's best to adjust the element itself, rather than the null object. This way, you can avoid dealing with the large position values of the null and instead deal with the relative values of the contained element.
Linking 2D Elements to Track Points
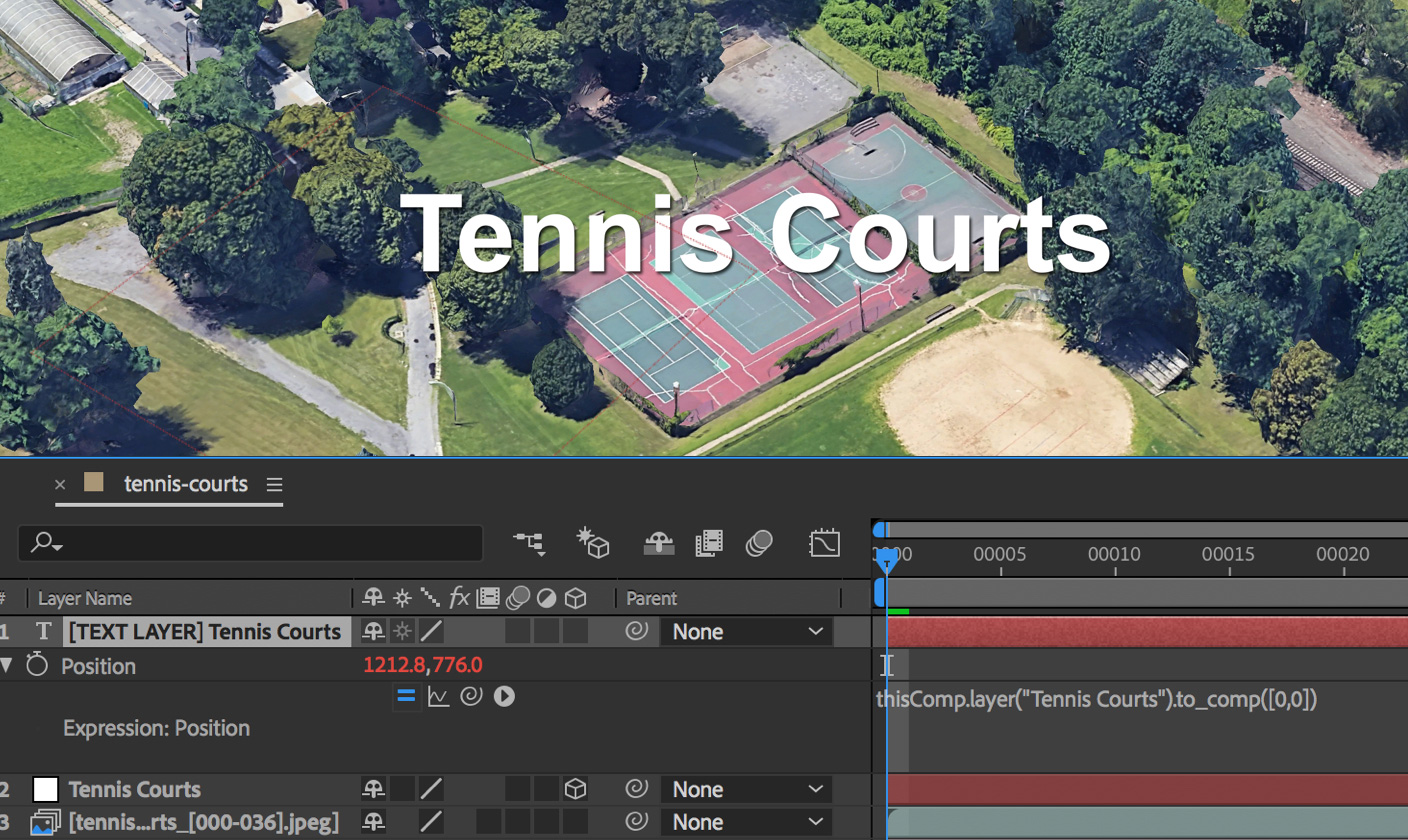
Sometimes, it's more useful to keep an element in screen space while it tracks to a point on the globe. A text label, for example, is much more legible in 2D because it won't change scale or orientation as the camera moves around it.
Using Expressions, it's easy to map a 2D element to a Track Point's null object. Make sure the 2D layer has no parent, and add the following expression to the position property:
thisComp.layer("Track Point Name").toComp([0,0])
Be sure to swap out the Track Point Name in quotes for the name of your Track Point layer.